How to Ride a Steep Roll-down
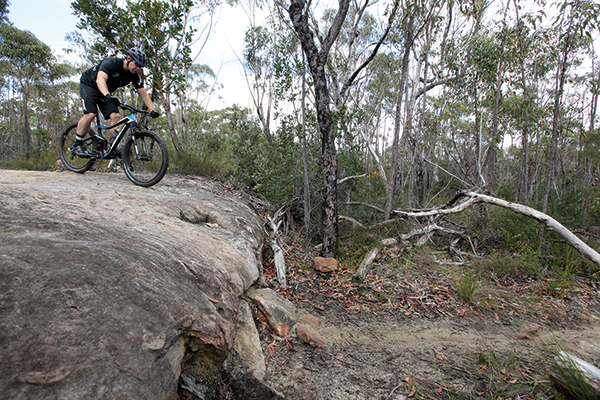
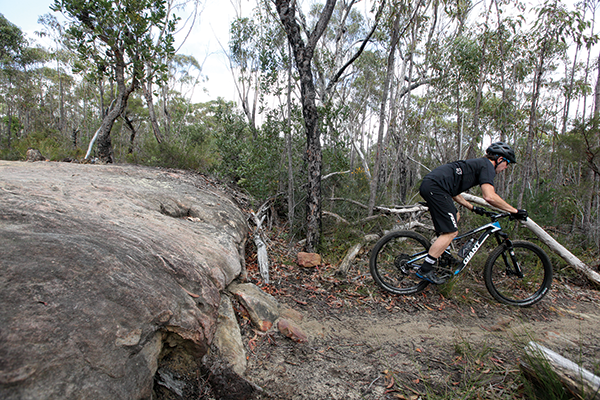
A short but steep roll-down can be an intimidating thing—even for the moderately experienced rider. But as with most things in mountain biking, employing the correct skills will see you through unscathed. If you want to play it safe, scope out the drop beforehand. Hop off the bike and roll the wheels down the drop. Check to see if the chainrings will hit the ground and ensure that there’s nothing to suddenly catch your wheel at the base of the drop. Check those boxes if you wish or just proceed as follows if you’re confident and riding a trail that’s within your comfort zone.
First up, you should be following trail-riding rule #1; you should be looking well ahead. As you see the obstacle, assume the ‘attack position’. That means you get off the saddle with your pedals level and your arms and knees bent. Bend your elbows out – not down – so they stick out like chicken wings to the sides. While it’s easier said than done, you need to relax. Grip the bars lightly and keep your arms loose and pliable—they are your suspension and you 1 don’t want to leave it locked out!
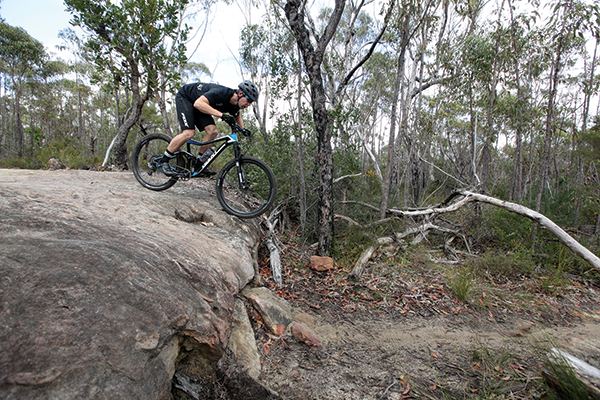
You’re now fully committed. Hesitating or hitting the brakes at this point will be worse than just riding it out, so don’t panic and just roll with it. By all means cover your brakes, feather them gently if you need to control your speed but don’t slam them on! You should approach the roll-down at brisk walking pace; fast enough to have balance but not too fast or you’ll slam into the bottom of the drop with too much momentum and may get pitched forward.
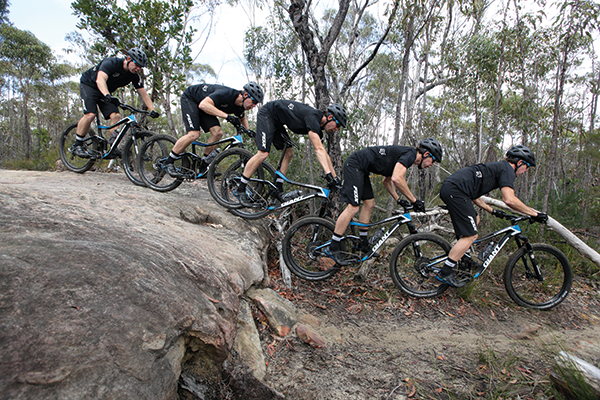
Just as you approach the crest, bend your arms even more, pulling your torso forward and over the bars. You may feel like getting your weight back at this point—resist this urge! As much as moving forward seems counter intuitive, it readies you for the following step.
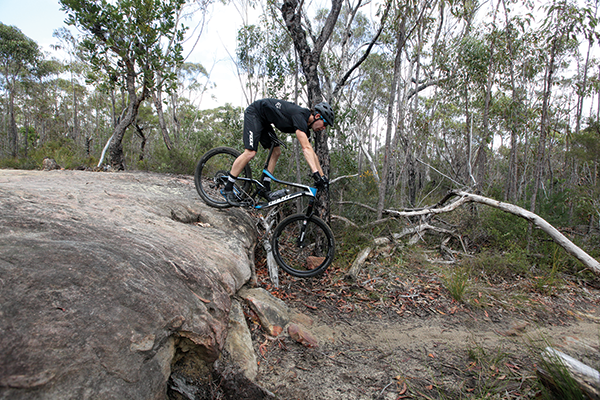
As the front wheel starts to go down the drop, extend your arms and allow the bike to roll away from your body. Your arms will straighten as the bike speeds up and the saddle will need to slip between your legs—make sure you don’t snag your shorts and get stuck in front of the seat or you’ll be in trouble.
When done properly, the bike will accelerate momentarily but your body won’t pick up speed as rapidly. This is where physics come into play; you may weigh 70 or 80kg but the bike is only 13kg. When your body gains speed, it’s much harder to slow down than the bike. If you’ve already got your weight back and arms outstretched in step two, you’ll accelerate at the same rate as the bike once you hit the slope. By going from a forward body position at the top, you’re allowing the bike to speed up while your torso maintains a more consistent pace.

Once the front wheel hits the bottom, your arms should bend as you suck up the transition. Remember that you’re still relaxed, right? A loose body is free to move around on the bike as required. As your absorb the transition, you’ll move forward and return to the centre of the bike. Don’t forget the saddle too; it needs to go back between your legs as you re-centre yourself. I’ve seen plenty of people execute steps one through to three perfectly, only to get stuck behind the saddle at the bottom—with their weight all the way back they’re left with no steering control and usually veer off into the bushes. Drop your saddle out of the way for added confidence when tackling a roll-down and you’ll be less likely to get caught behind.
Always practise on smaller and less intimidating drops to begin with, then work your way up. The steeper and bigger the rolldown, the more natural this technique will feel, but make sure that you’re really shifting your body around as described. Many people think they are moving when they’re actually quite static and ‘just going along for the ride.’
With good technique you’ll be able to control your speed nicely and make steep roll-downs appear small and easy.
