Ride Skinny Trail Features!
 More than just a novel trick, being able to ride ‘skinnies’ is a skill that can provide real benefits on the trail.
You’ve probably seen it on videos; riders way up in the trees on impossibly narrow wooden structures. While it certainly looks scary, and you mightn’t plan on doing it anytime soon, the basic skills of balance, control and finesse can help in just about any technical riding situation.
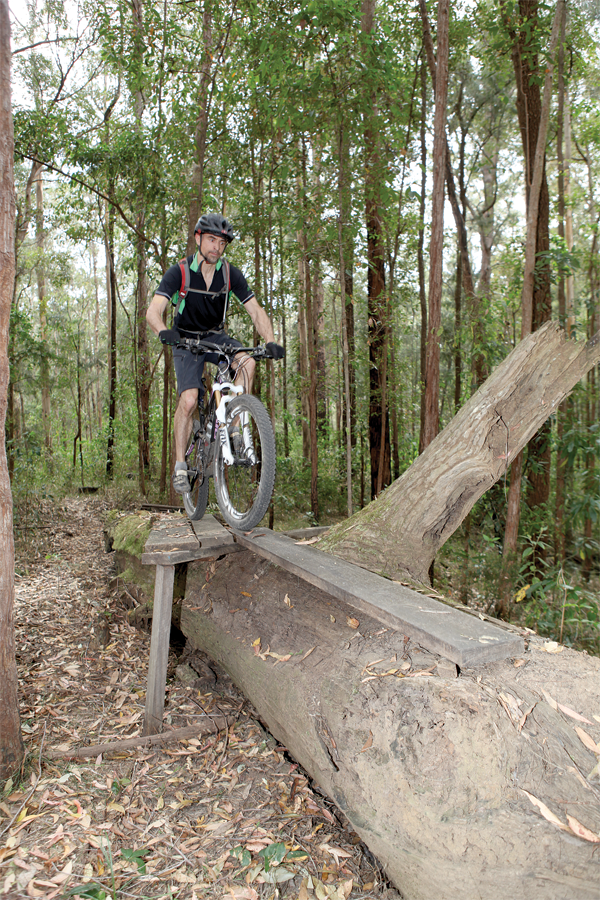
Often called ‘north shore’, riding on wooden structures originated in the North Shore suburbs of Vancouver, British Columbia (Canada), where trail builders used them as a way to traverse boggy patches, creeks and fallen trees. While it was originally a way of making the trails more rideable, it eventually morphed into a riding style of its own where the wooden structures became the challenge. Now you’ll find north shore features incorporated into trails everywhere, and as with any sort of trail building, these structures will range from fully professional to downright dodgy. So before you get too excited and blindly hit-up the north shore feature nearest to you, scope it out properly and check that it isn’t rotten and about to collapse!
Learning to ride skinnies is a two-part game; part skills based and part psychological. The mental side of it is easy to demonstrate; try riding on the 15cm wide white line that you’ll find on the verge of any road—not too hard eh? You can probably stay on it for a fair distance. Now think about the exact same thing if that 15cm wide surface was elevated a metre off the ground; makes for a whole different ballgame.
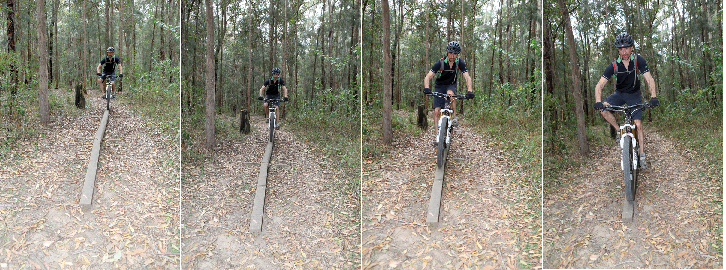
Mastering the mind-game comes down to familiarity, confidence and experience—all things that you’ll gain through practice. It’s surprisingly easy to gain this practice too; you don’t even need north shore features on your local trails. Start by riding along a two or three metre long plank of wood placed on the ground—it may even be possible to do it in your own backyard. While you’re at it, look for suitable obstacles in your local area; ride along the top of square-topped concrete gutters when you commute to work, aim to follow straight lines when road riding and so on.
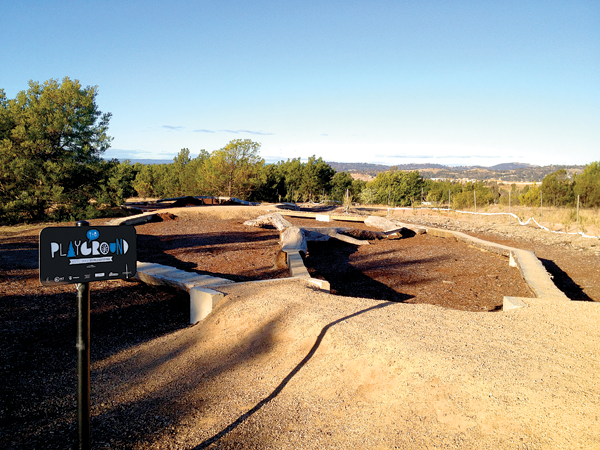
Of course you should go and play in the skills area at your local trail network (if you have that luxury), but getting creative in other ways will give you more confidence in a variety of situations. Always start out small; starting on something that’s too tough will dent your confidence, and as we already mentioned, confidence is an integral part of this. Begin by riding along a plank of 6x2. Once you become proficient, join two planks to make it longer. You can also vary the difficulty by approaching the obstacle at different speeds—the slower you go, the tougher it gets. Once you’ve mastered the 6x2 plank, move onto something narrower—a long bit of 4x4 will really test your composure. Next add some corners and slopes to toughen it further. Of course, all of this can be done barely off the ground so there’s very little risk but plenty of skill involved.

What follows are the skills and techniques you need to employ to successfully negotiate skinnies—it’s no use practising without direction as you’ll only develop bad habits.
Looking Ahead
This applies to every aspect of mountain biking; look where you want to go, not at the things you need to avoid—stare for too long at a rock and you’ll surely hit it. The same thing applies to skinnies, so you need to focus on the line and not too either side. You also need to look ahead; when tackling a skinny at jogging pace, you need you look a good three or four metres beyond your front wheel. Where a skinny isn’t excessively long, place your gaze on the exit point. Look further ahead as you travel faster and less so at low speed, but even at a near standstill you still need to look a couple of metres ahead—just keep the front wheel in your peripheral vision. Stare down at your front wheel and you’re sure to waver off-line.
Gear Selection
Unless you’ve got gravity or momentum on your side, you’ll really need to pedal. What’s more, pedalling can actually assist with speed control and balance if select the right gear. Even if you are travelling slowly it’s better to over-gear yourself a little. Select too low a gear and you’ll bounce around whilst pedalling. A bigger gear gives you something solid to push against and the lower cadence helps with stability—it helps you feel the bike and control your momentum a little better.
Momentum
A little bit of momentum will work in your favour, to a point anyway. Going back to your on-road commute to the office; following that white line is isn’t too hard at 25kp/h but it requires plenty of concentration when your doing 5kp/h. You need to strike a balance between stability adding speed and negotiating the skinny at a sensible pace. You need to account for the entry and exit of the obstacle as well as any corners—coming off at speed is probably going to hurt more too! The better you get, the slower you’ll be able to go whilst maintaining balance and that’s what you should be aiming for. Aim to ride at a fast jogging pace to begin with and slow it down from there if you want to test yourself.

Body Position
Approach any obstacle with a relaxed upper body, bent arms and a neutral position on the bike. Riding skinnies requires subtle but constant adjustments to maintain balance and tensing up will only restrict movement between your body and bike. Beyond this, there is no one correct position; some may find it easier when standing, whist seated works better for others (having the saddle as a reference point certainly seems to help at lower speeds anyway). Experiment a little and see what works for you. Just remember; above all you’ve got to relax!
Balance
With a bit of speed on your side, riding straight is all about staying relaxed, looking ahead and fixing your gaze on the exit—the rest should fall into place. There will be very little steering input at speed. Even at lower speeds on narrower lines you won’t turn the bars and steer a lot. Maintaining balance at and lower speeds requires small adjustments in your bodyweight. Just as holding your arms out helps you maintain balance when walking, small movements in your arms and legs can help you balance on the bike. Try moving your knees in or out to counterbalance and shift your torso around as required but keep the bike relatively upright.
Add Variety
Mix things up to work both the technical and mental aspect of riding skinnies. Narrow your plank to test your skill but keep it on the ground. Alternate this with attempting a wider plank that’s elevated to exercise (or ostracise) your height aversion.
When things get tricky, use flat pedals. This makes bailing less fearful and allows you to stick a leg out to counterbalance in really tough low-speed riding. Also try feathering your brakes whilst pedalling as this can sometimes add stability.
Knowing how to crash is also important if you are going to attempt any elevated skinnies. Sometimes a sideways bunny hop or wheelie-off will suffice but on really high skinnies you’re probably better off bailing clear of the bike. If you can’t bail confidently or bunny hop/wheelie off, you shouldn’t be attempting anything elevated—keep your tyres close to terra firma to begin with.

There’s virtually no end to the progression—you’ll always be able to find something tougher and more challenging to tackle. Skinny corners at low speed may require subtle rear wheel hops to keep it on the same path as the front wheel for example. Adding ups and downs will also keep things interesting as will seesaws, gaps, drops and so on.
It’s all about trying something new, challenging yourself and sharpening your skills. While your average natural trail mightn’t include any woodwork, the same skills will assist whenever you need to hold a line at low speed in technical terrain.


